
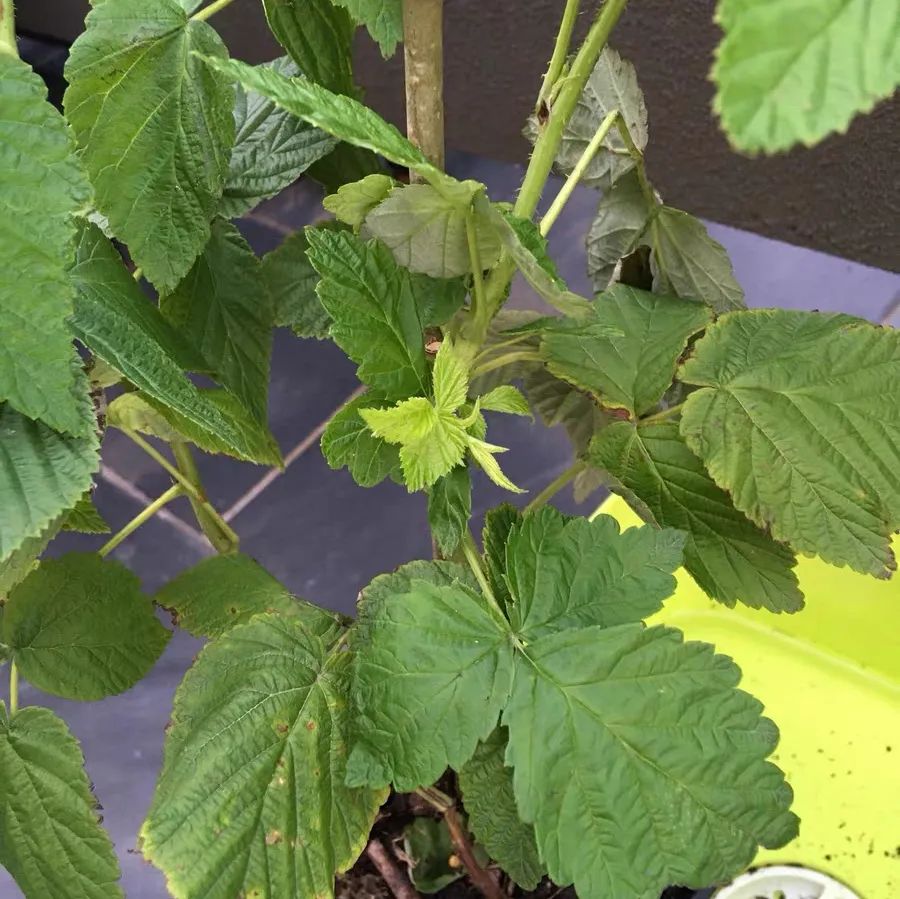
# After the Spring Festival: Raspberry Potted Plant Care Guide for Beginners
After the Spring Festival, many gardening enthusiasts will notice new buds sprouting on their potted raspberries. But don’t rush to overwater them! By following these key steps—**seedling selection, soil preparation, and daily maintenance**—you’ll not only help the plants grow vigorously but also harvest branches full of sweet, juicy berries. Creating a home-style "berry paradise" has never been easier!
## Step 1: Seedling Selection & Soil Preparation
### Varieties
- Red raspberries: Boast high ornamental value and dense fruiting.
- Yellow raspberries: Offer an exceptionally sweet taste.
- For beginners: Prioritize disease-resistant varieties. These are cold-tolerant and suitable for both southern and northern China.
### Planters
- Choose breathable terracotta pots or gallon pots with a **diameter of 30cm+ and depth of 40cm**. Drill 3-5 drainage holes at the bottom (you can also DIY with a milk tea cup—drilling more holes on the sides improves breathability) to prevent waterlogging and root rot.
### Soil Mix
- Formula: 3 parts leaf mold + 2 parts coconut coir + 1 part perlite. Mix in a handful of decomposed sheep manure or earthworm castings.
- pH Requirement: Adjust to 5.5-6.5 (raspberries thrive in slightly acidic soil).
- Tip: Don’t fill the pot to the brim—leave a 2cm gap from the pot rim. Top with a layer of maifan stone to prevent soil splashing when watering.
## Step 2: Watering & Lighting
### Watering
- Spring & Autumn: Water once every 2-3 days, but only when the soil 2cm below the surface feels dry. Ensure thorough watering until water drains from the bottom.
- Summer: Water once in the morning and once in the evening (avoid midday heat). Increase watering during the fruit expansion period, but never let water accumulate at the pot bottom.
- Winter: Water only when the soil is slightly dry—avoid "cold water shock" to the roots.
### Lighting
- Raspberries need **at least 6 hours of direct sunlight daily**; a south-facing balcony is ideal.
- Summer: Use a sheer curtain to shade the plants during midday to prevent leaf scorching.
- Note: Insufficient light causes leggy growth, reduced fruiting, and less sweet berries.
## Step 3: Pruning & Shaping
### Spring Pruning (Before Budding)
- Cut off all dead branches and weak, thin branches. Keep 5-7 thick, healthy main branches per plant, and space them out to improve air circulation and light penetration (reduces disease risk).
### Summer Pruning
- When new branches grow to 30cm, pinch off the top buds to encourage side branch growth (side branches are the main fruit-bearing parts!).
- When side branches reach 15cm, pinch the tops again to keep the plant short, sturdy, and prevent lodging.
### Tool Preparation
- Wipe pruning shears with alcohol to disinfect. After pruning, apply carbendazim to the cut wounds to prevent pathogen infection.
## Step 4: Fertilization & Staking
### Fertilization
- Base Fertilizer (During Transplanting): Line the pot bottom with a layer of bone meal + decomposed chicken manure to release nutrients slowly and strengthen root development.
- Top-Dressing (By Growth Stage):
- Bud Stage: Water with diluted soybean cake fertilizer (1:100 ratio) to promote lush foliage growth.
- Pre-Flowering Stage: Spray potassium dihydrogen phosphate (1:1000 ratio) on leaves and water the soil around the roots to encourage more flower buds.
- Golden Rule: "Apply dilute fertilizer frequently." Concentrated fertilizer burns roots—better to under-fertilize than over-fertilize!
### Staking
- Build a "well"-shaped frame with bamboo poles. Gently tie the branches to the frame. This keeps fruits off the soil, prevents branch breakage, and maintains a neat plant appearance.
## Step 5: Pest & Disease Control
### Diseases
- Powdery Mildew (White Mold on Leaves): Spray a baking soda solution (1g baking soda mixed with 500ml water) once a week.
- Stem Rot (Rotten Stems): Scrape off the diseased parts, apply a mixture of Azoxystrobin + Pyrimethanil, and let the plant dry before placing it back in the pot.
### Pests
- Aphids/Fruit Flies: Hang yellow sticky traps—an eco-friendly and effective method.
- Stem-Boring Beetles: Spray chlorantraniliprole (low-toxicity) on stems and soil surface.
## Step 6: Harvesting & Winter Care
### Harvesting
- Pick berries when they turn fully red and fall off easily with a light touch—this is when they’re sweetest!
- Harvest in the morning, as berries accumulate more sugar overnight and taste juicier.
### Winter Care
- Northern China: Move potted raspberries indoors, keep the temperature above 5℃, and water only when the soil is dry.
- Southern China: Wrap the pot with straw outdoors and cover branches with plastic bags to protect against wind. Stop fertilizing to let the plant "rest and store energy" during dormancy.
## Bonus Growing Tips
- **Cutting Propagation**: In spring, cut 10cm-long healthy branches, soak them in rooting powder, and insert them into vermiculite. Keep the medium moist and shaded—new roots will grow in 1 month, letting you expand your collection from one pot to many.
- **Fruit Bagging**: Cover fruit-bearing branches with insect-proof mesh bags to protect berries from bird pecking and fruit flies, ensuring clean, unspoiled harvests.
You’ll be able to enjoy home-grown raspberries in just 3 months—their sweet-tart flavor will make your taste buds sing! Tag a friend to grow raspberries together and achieve "berry freedom" next year!
Raspberry Growing Tips for Balconies Supplementary Notes:
Share with
Tagged in :


Leave a Reply